
Noise Level 250

Noise Level 500

Noise Level 750
In this part of the project I will be making use of stable diffusion models to create images from noise. I will also be making cool stuff like orientation-based illusion images and frequency-based illusion images.
We will start by creating a function that adds noise to an image. Here is the result of running it on our test image which is the Campanile.
Noise Level 250
Noise Level 500
Noise Level 750
We can start off by trying out a classical method of denoising which is adding gaussian blur. But we can see this doesn't really work and sacrifices a lot of image quality.
Noise Level 250

Noise Lvl 250, Gaussian Blurred
Noise Level 500

Noise Lvl 500, Gaussian Blurred
Noise Level 750

Noise Lvl 750, Gaussian Blurred
We can then use the pretrained UNet to one-step denoise the image from various noise levels.
Noise Level 250

Noise Lvl 250, Denoised by UNet
Noise Level 500

Noise Lvl 500, Denoised by UNet
Noise Level 750

Noise Lvl 750, Denoised by UNet
Using one step denoising usually doesn't really yield good results so in practice we try to iteratively denoise the image by denoising it bit by bit each tiem.

Iterative Denoise i=0

Iterative Denoise i=5

Iterative Denoise i=10

Iterative Denoise i=15

Iterative Denoise i=20
Here is the image cleaned with iterative denoising compared to one-step denoising and gaussian blur:.

Iteratively Denoised Campanile

One-step Denoised Campanile

Gaussian-Blur-Denoised Campanile
Using pure noise as the first input to the image, we can prompt the image to generate something from scratch.

Generated Image 1

Generated Image 2

Generated Image 3

Generated Image 4

Generated Image 5
We can gain better results by using classifier free guidance. Using the prompt "a high quality image" and a gamma of 5 we gain the following results:

CFG Generated Image 1

CFG Generated Image 2

CFG Generated Image 3

CFG Generated Image 4

CFG Generated Image 5
By adding some noise to an image and putting it into the model, we can generate small edits to existing images.

SDEdit with start_i=1

SDEdit with start_i=3

SDEdit with start_i=5

SDEdit with start_i=7

SDEdit with start_i=10

SDEdit with start_i=20
We can do the same with hand drawn images or non-realistic images from the web to generate realistic versions of them.

Online Image with start_i=1

Online Image with start_i=3

Online Image with start_i=5

Online Image with start_i=7

Online Image with start_i=10

Online Image with start_i=20

Hand-drawn Snowman with start_i=1

Hand-drawn Snowman with start_i=3

Hand-drawn Snowman with start_i=5

Hand-drawn Snowman with start_i=7

Hand-drawn Snowman with start_i=10

Hand-drawn Snowman with start_i=20

Hand-drawn Face with start_i=1

Hand-drawn Face with start_i=3

Hand-drawn Face with start_i=5

Hand-drawn Face with start_i=7

Hand-drawn Face with start_i=10

Hand-drawn Face with start_i=20
We can also do inpainting by blocking out a patch of the image and prompting the model to fill in the blank, keeping the rest of the image the same.

Clean Image of Campanile

Mask for Inpainting

Part of image to be painted over

Inpainted Image
We can also use the prompt to transform one image into another by adding some noise and running it through the model.

Campanile to Rocket with start_i=1

Campanile to Rocket with start_i=3

Campanile to Rocket with start_i=5

Campanile to Rocket with start_i=7

Campanile to Rocket with start_i=10

Campanile to Rocket with start_i=20
We can also make visual anagrams as well by prompting the model to generate different things when the image is upright vs upside down.

Upright Image of Old Man

Upside Down Image of People Around Campfire
In a similar vein, we can create illusions by prompting the model differently for low and high freq.

From Afar: Image of Old Man

Up Close: Image of People Around Campfire
In this part of the project I will be making a stable diffusion model from scratch using Pytorch.
First we take the MNIST handwritten digits dataset and add varying levels of noise to it as so:
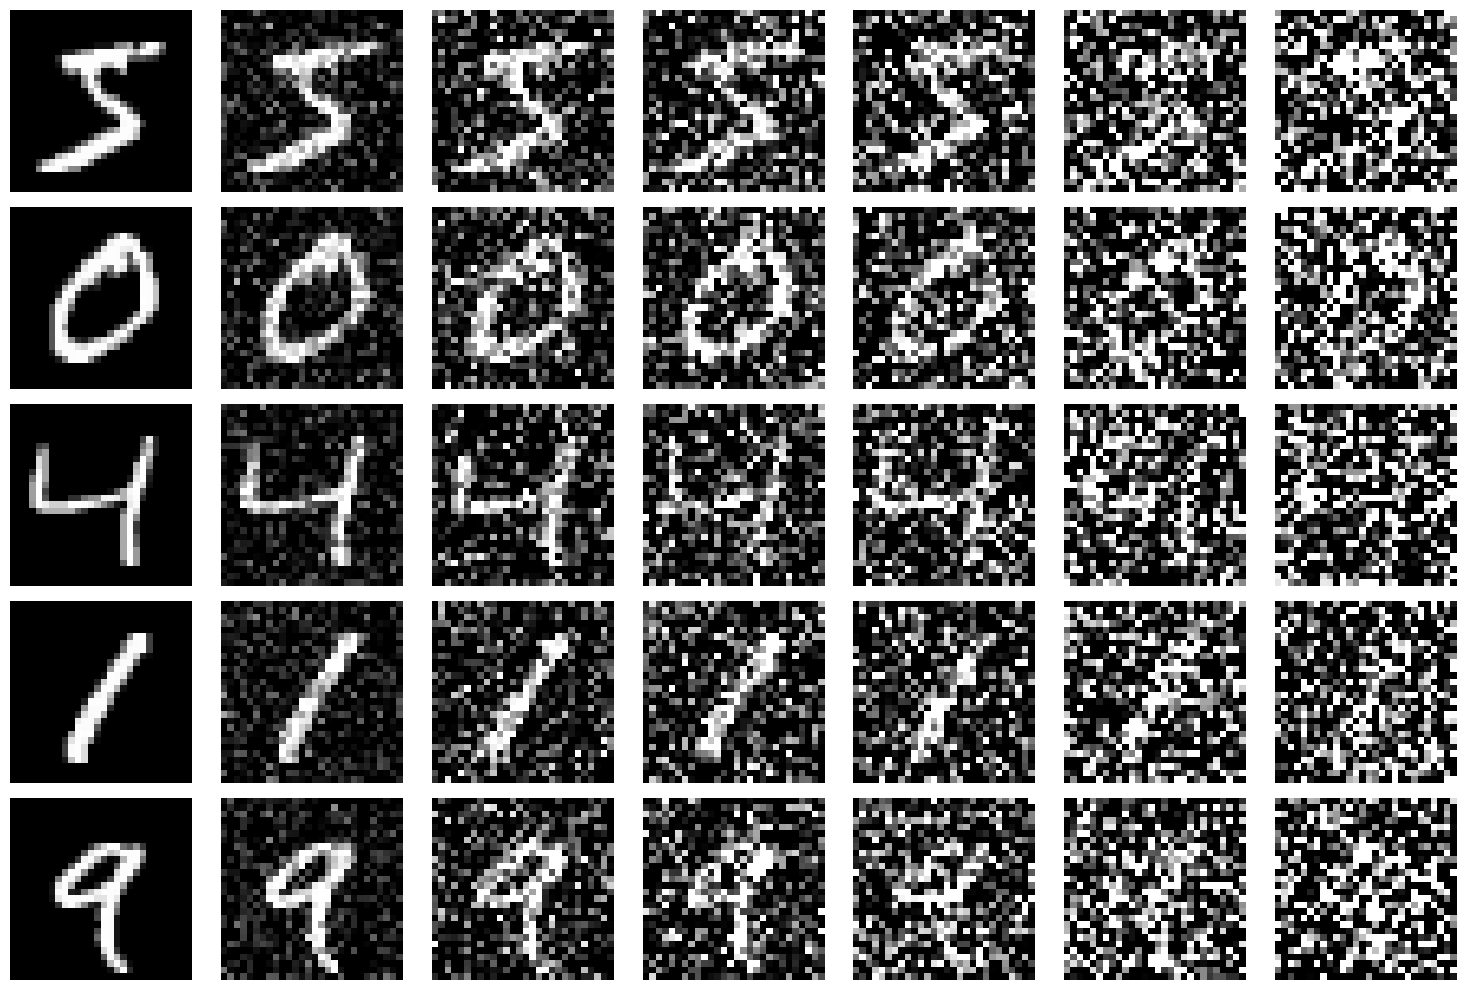
A sample image from the dataset with varying amounts of noise [0.0, 0.2, 0.4, 0.5, 0.6, 0.8, 1.0].
We're trying to create a model that takes a noisy image and predicts the clean image it came from. We can achieve this using a UNet architecture with some skip connections. To train the model, we feed in the images of the noisy digits and take evaluate its output using a L2 loss with the clean image. After training it over 5 epochs we get the following loss curve:

Loss curve for one step denoising UNet.
Here is what the model's denoising capabilities look like after one and five epochs of training:
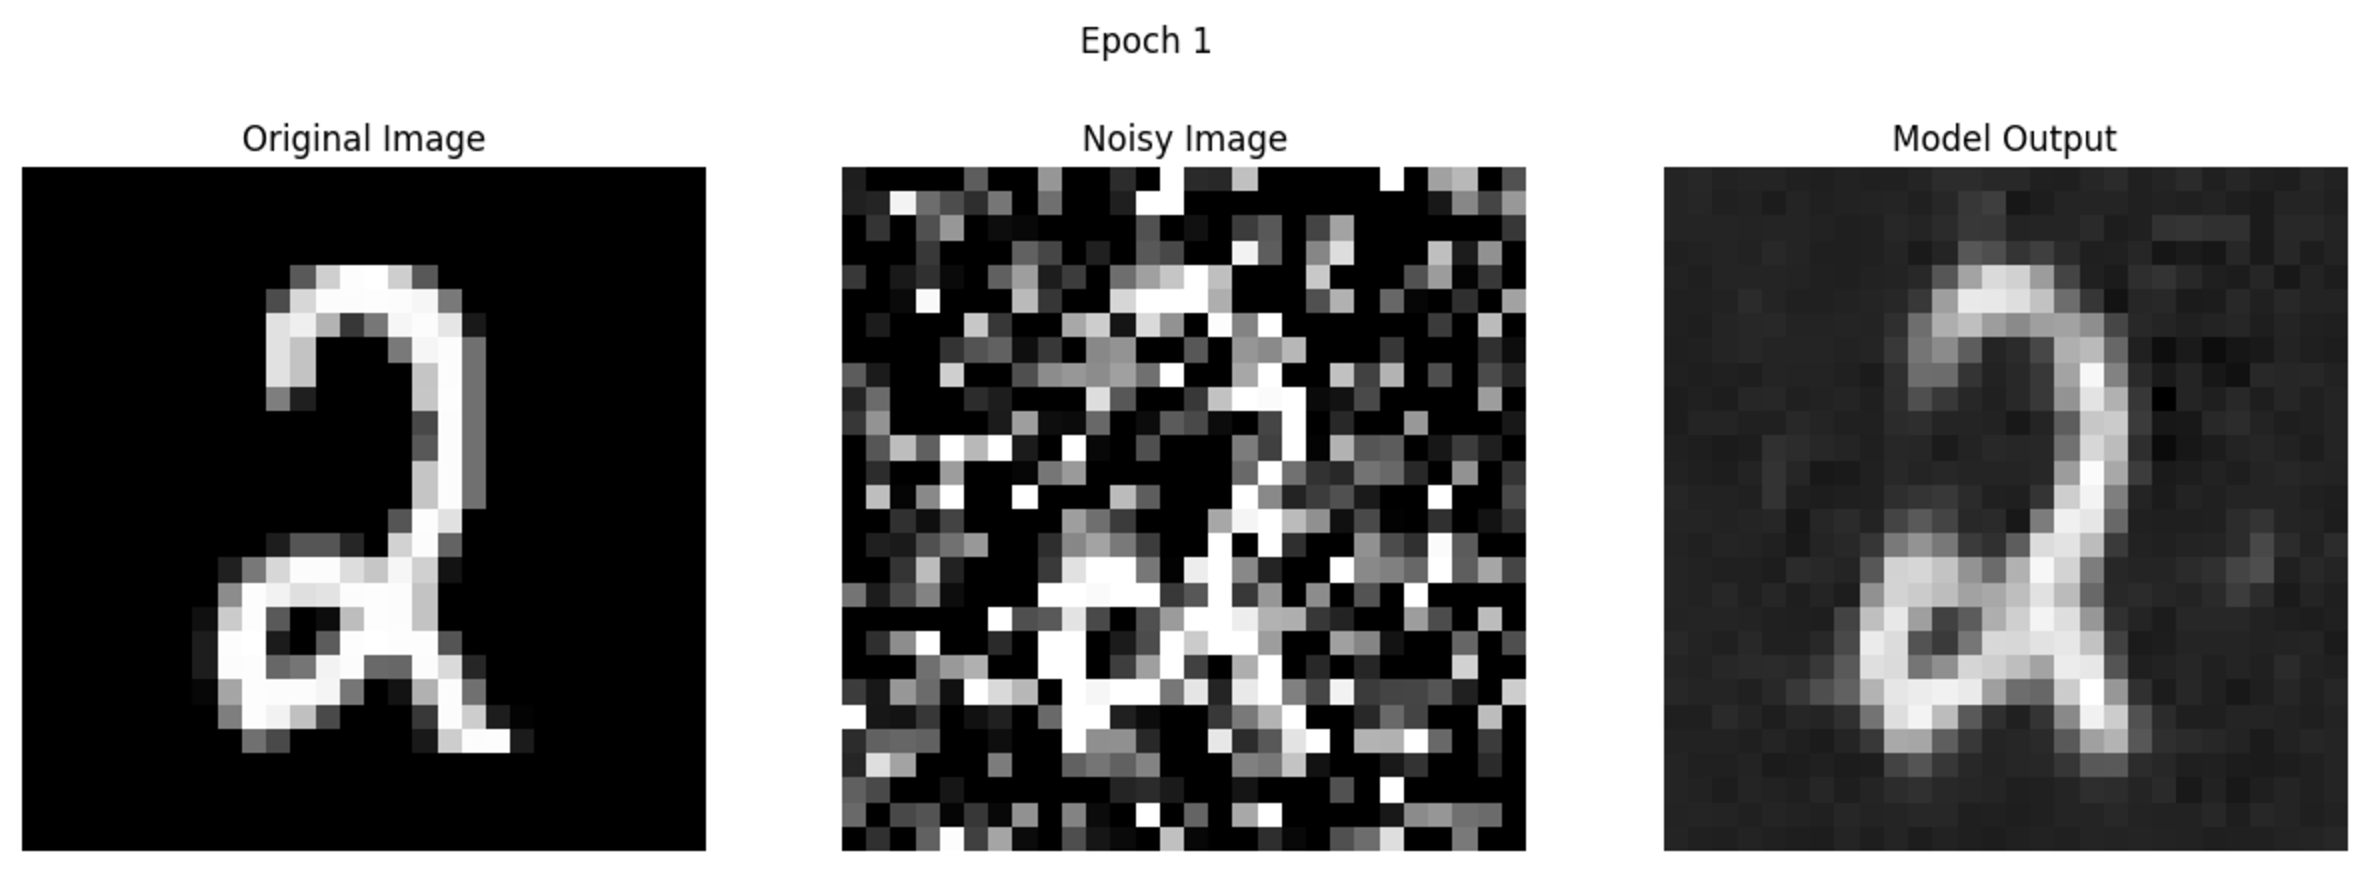
One-step denoising output after 1 epoch
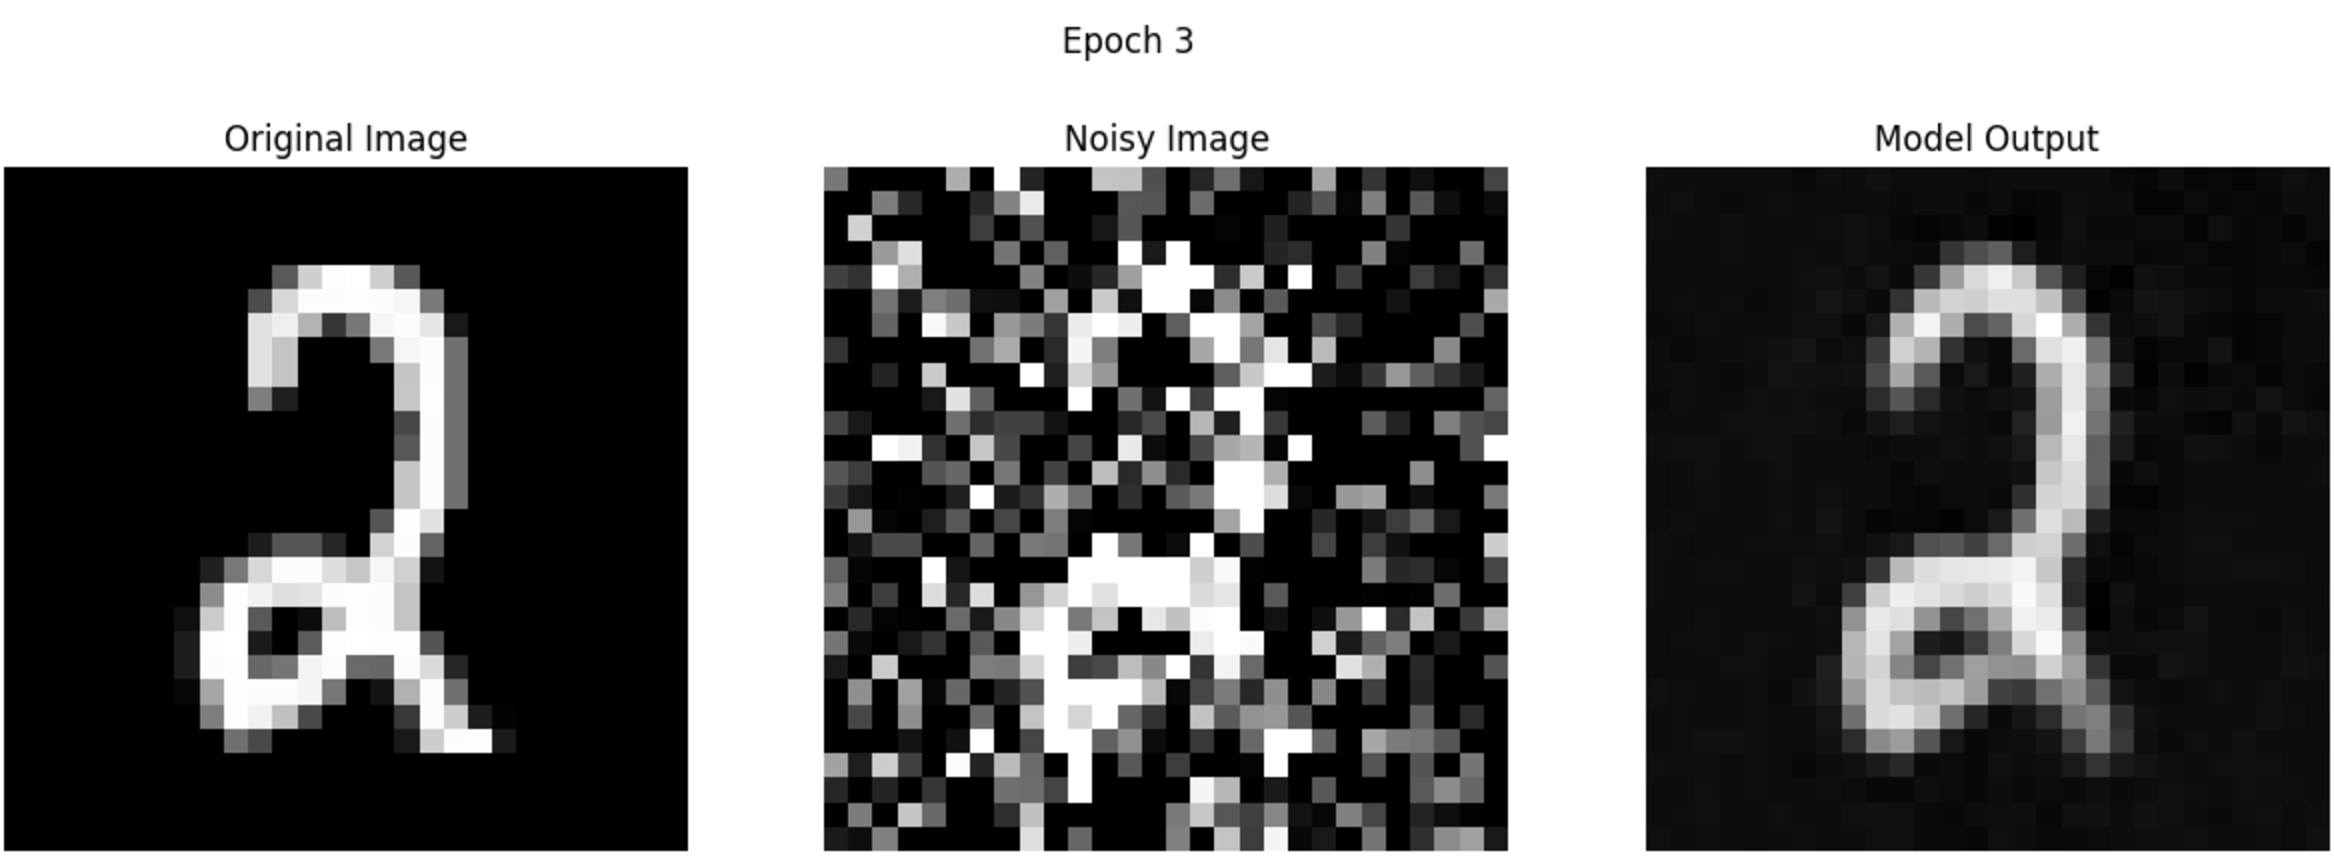
One-step denoising output after 3 epochs
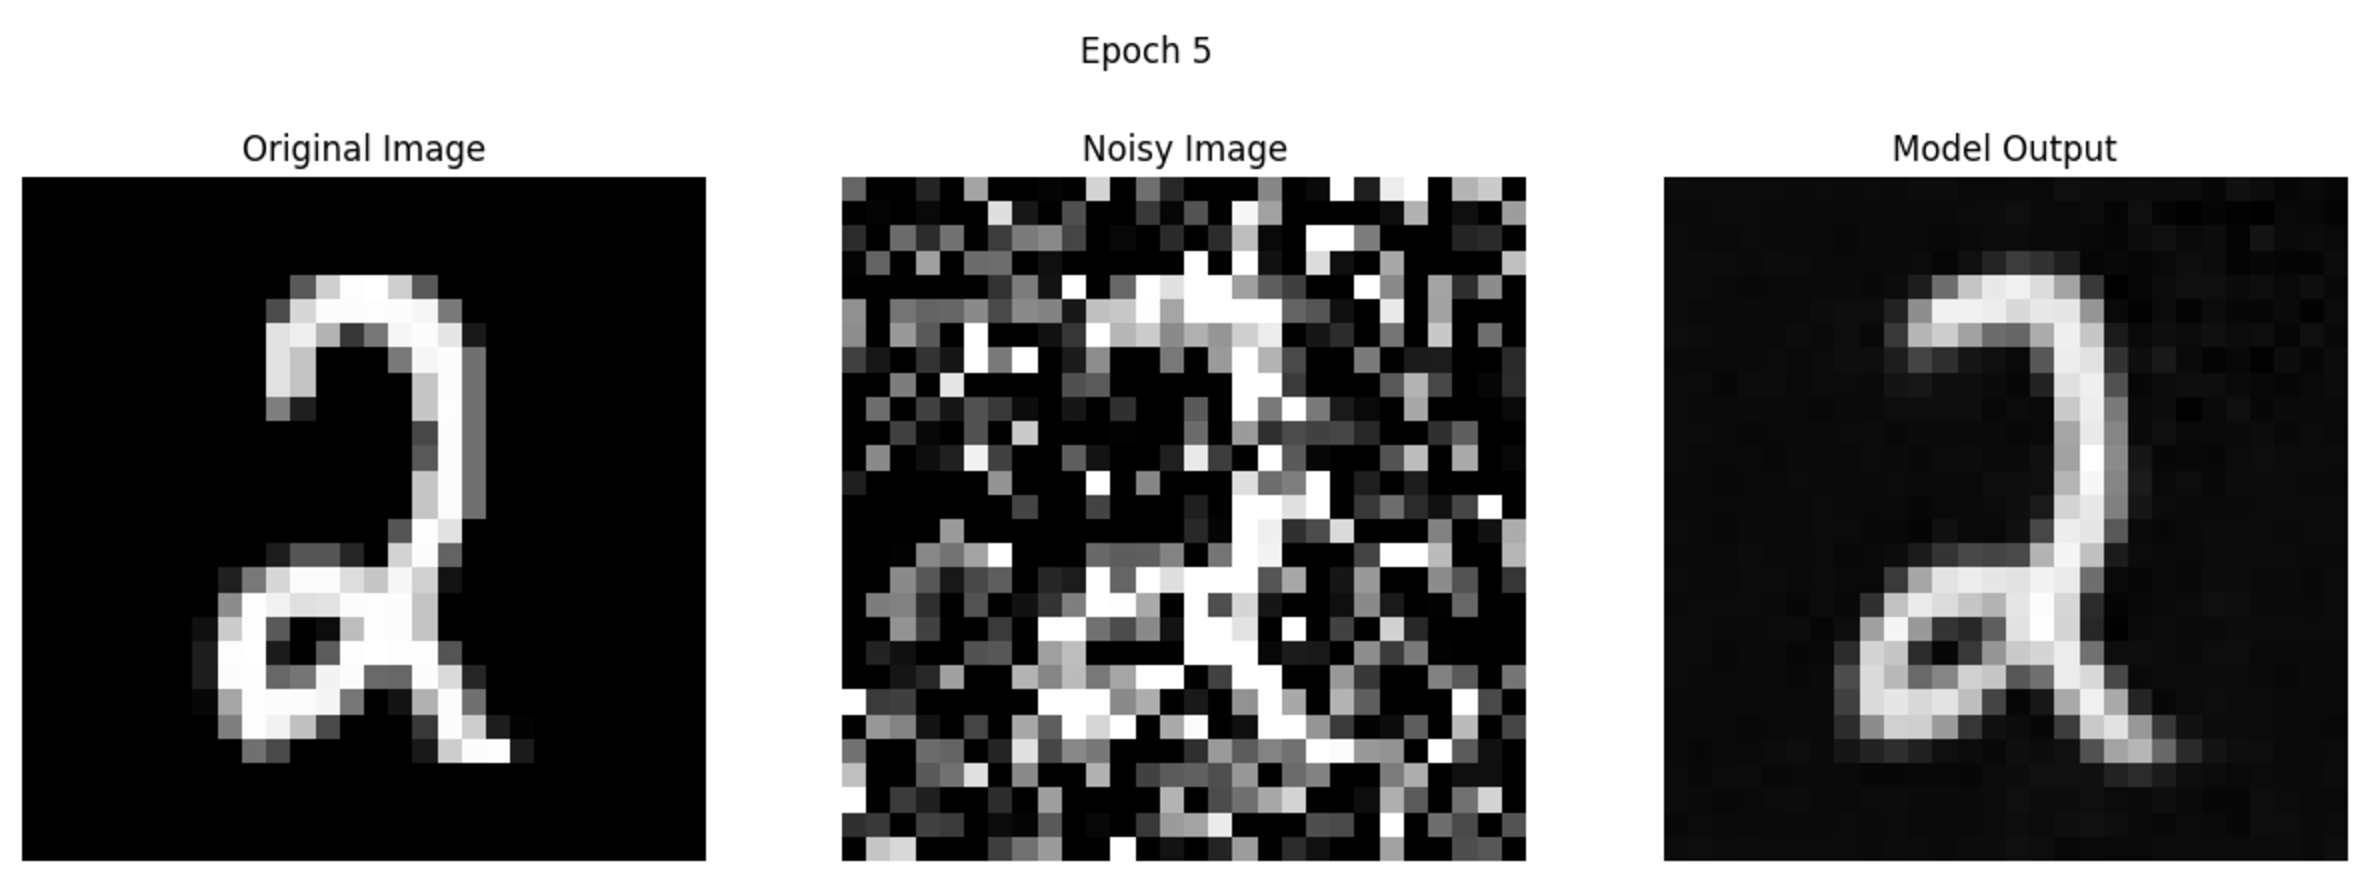
One-step denoising output after 5 epochs
Despite the model only being trained to denoise a level of alpha = 0.5, we can see that it also performs quite well for noise levels that it wasn't trained on:

With the model being able to successfully denoise an image at a certain noise level (0.5), we can now generalize the model to work with any noise level by conditioning the image on how much noise is the image expected to have. This will be useful when creating iterative denoising because we start from a very noisy image and slowly denoise one step at a time.
With some manipulation of the model architecture to condition its output on another input t, which represents the stage of denoising that the current image is on, we can train it a similar way as before and yield the following results:
Loss curve for UNet with time conditioning
We can generate some images by using iterative denoising and starting from images of pure noise. We can see the model getting progressively better at generating digits, but ultimately doesn't do a stellar job.
Epoch 1
Epoch 5
Epoch 10
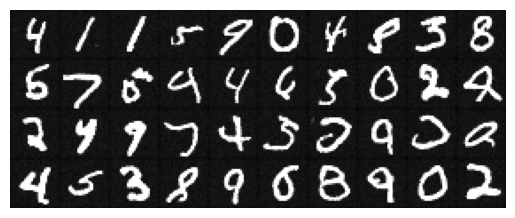
Epoch 20
Here is a GIF of the iterative denoising process:
Lastly, we also want our model to be able to generate a specific digit instead of just a random one. This should hopefully yield better results as the model is more guided towards a certain digit and should be able to generate more realistic images.
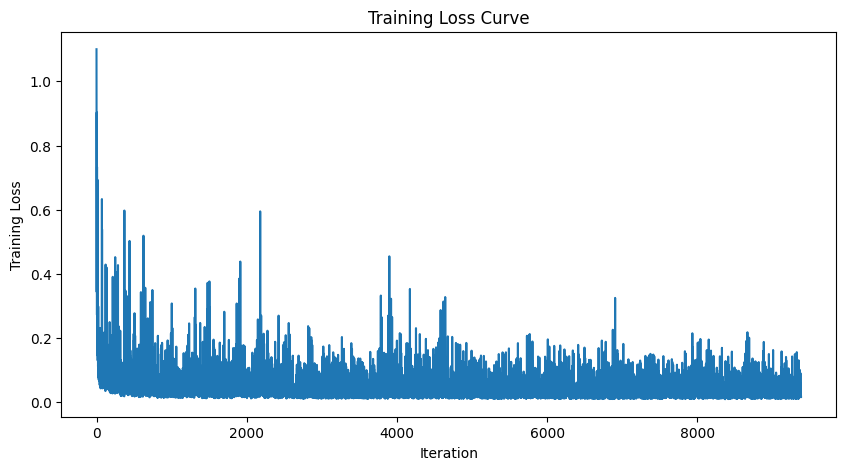
To achieve this, we simply condition the model on c as well, which is a one hot encoding of which digit the image should be. Training it the same way as above yields the following loss curve:
Loss curve for UNet with class conditioning as well
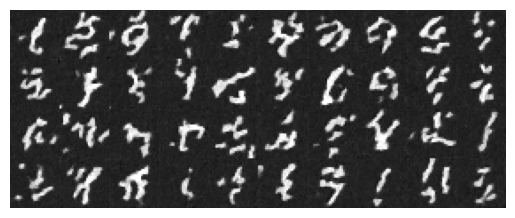
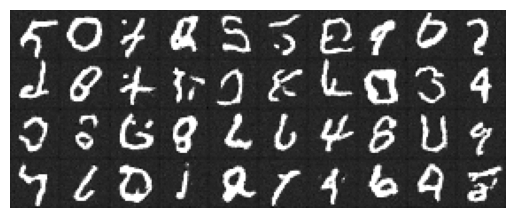
For image generation, we use classifier free guidance to provide better images. The course website said to use a gamma of 5 but my model performed better with gamma=2 so I will stick with that. Here are the results:
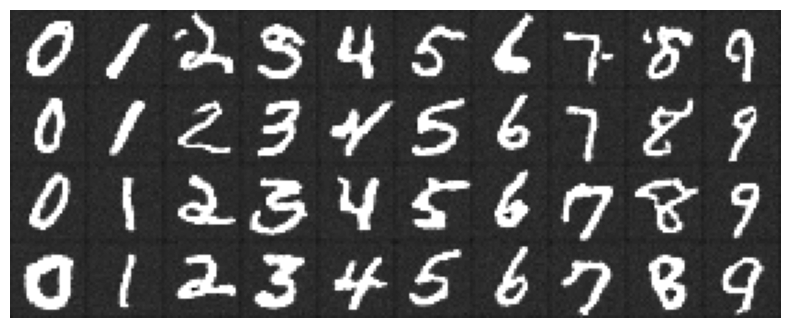
5 epochs
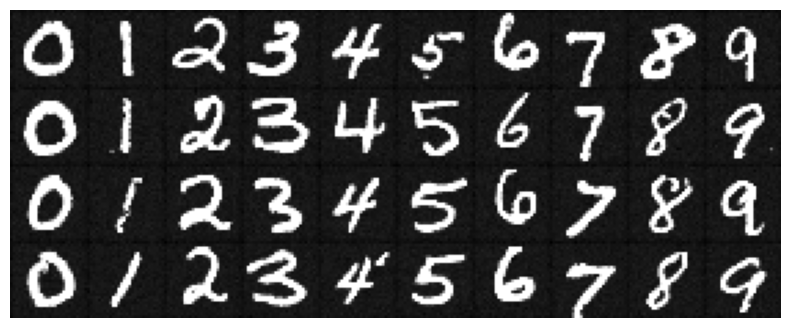
20 epochs